Operating Instructions
System Requirements
The minimum requirements are:
ArcGIS Pro version 3.3 or higher, or ArcMap version 10.5 or higher
A computer with Windows 10 or higher and
At least 2 GB RAM
The size of editable raster layers depends on the available RAM. Increasing virtual memory does not help, as increased use of virtual memory significantly reduces processing speed. The required disk storage space depends heavily on the number and size of simulation intermediate steps to be output (in the form of GeoTIFFs).
FloodArea HPC 11 can be started in ArcMap via the GUI and in ArcGIS Pro via the Ribbon. The Toolbox is available in both GIS apps.
Warning
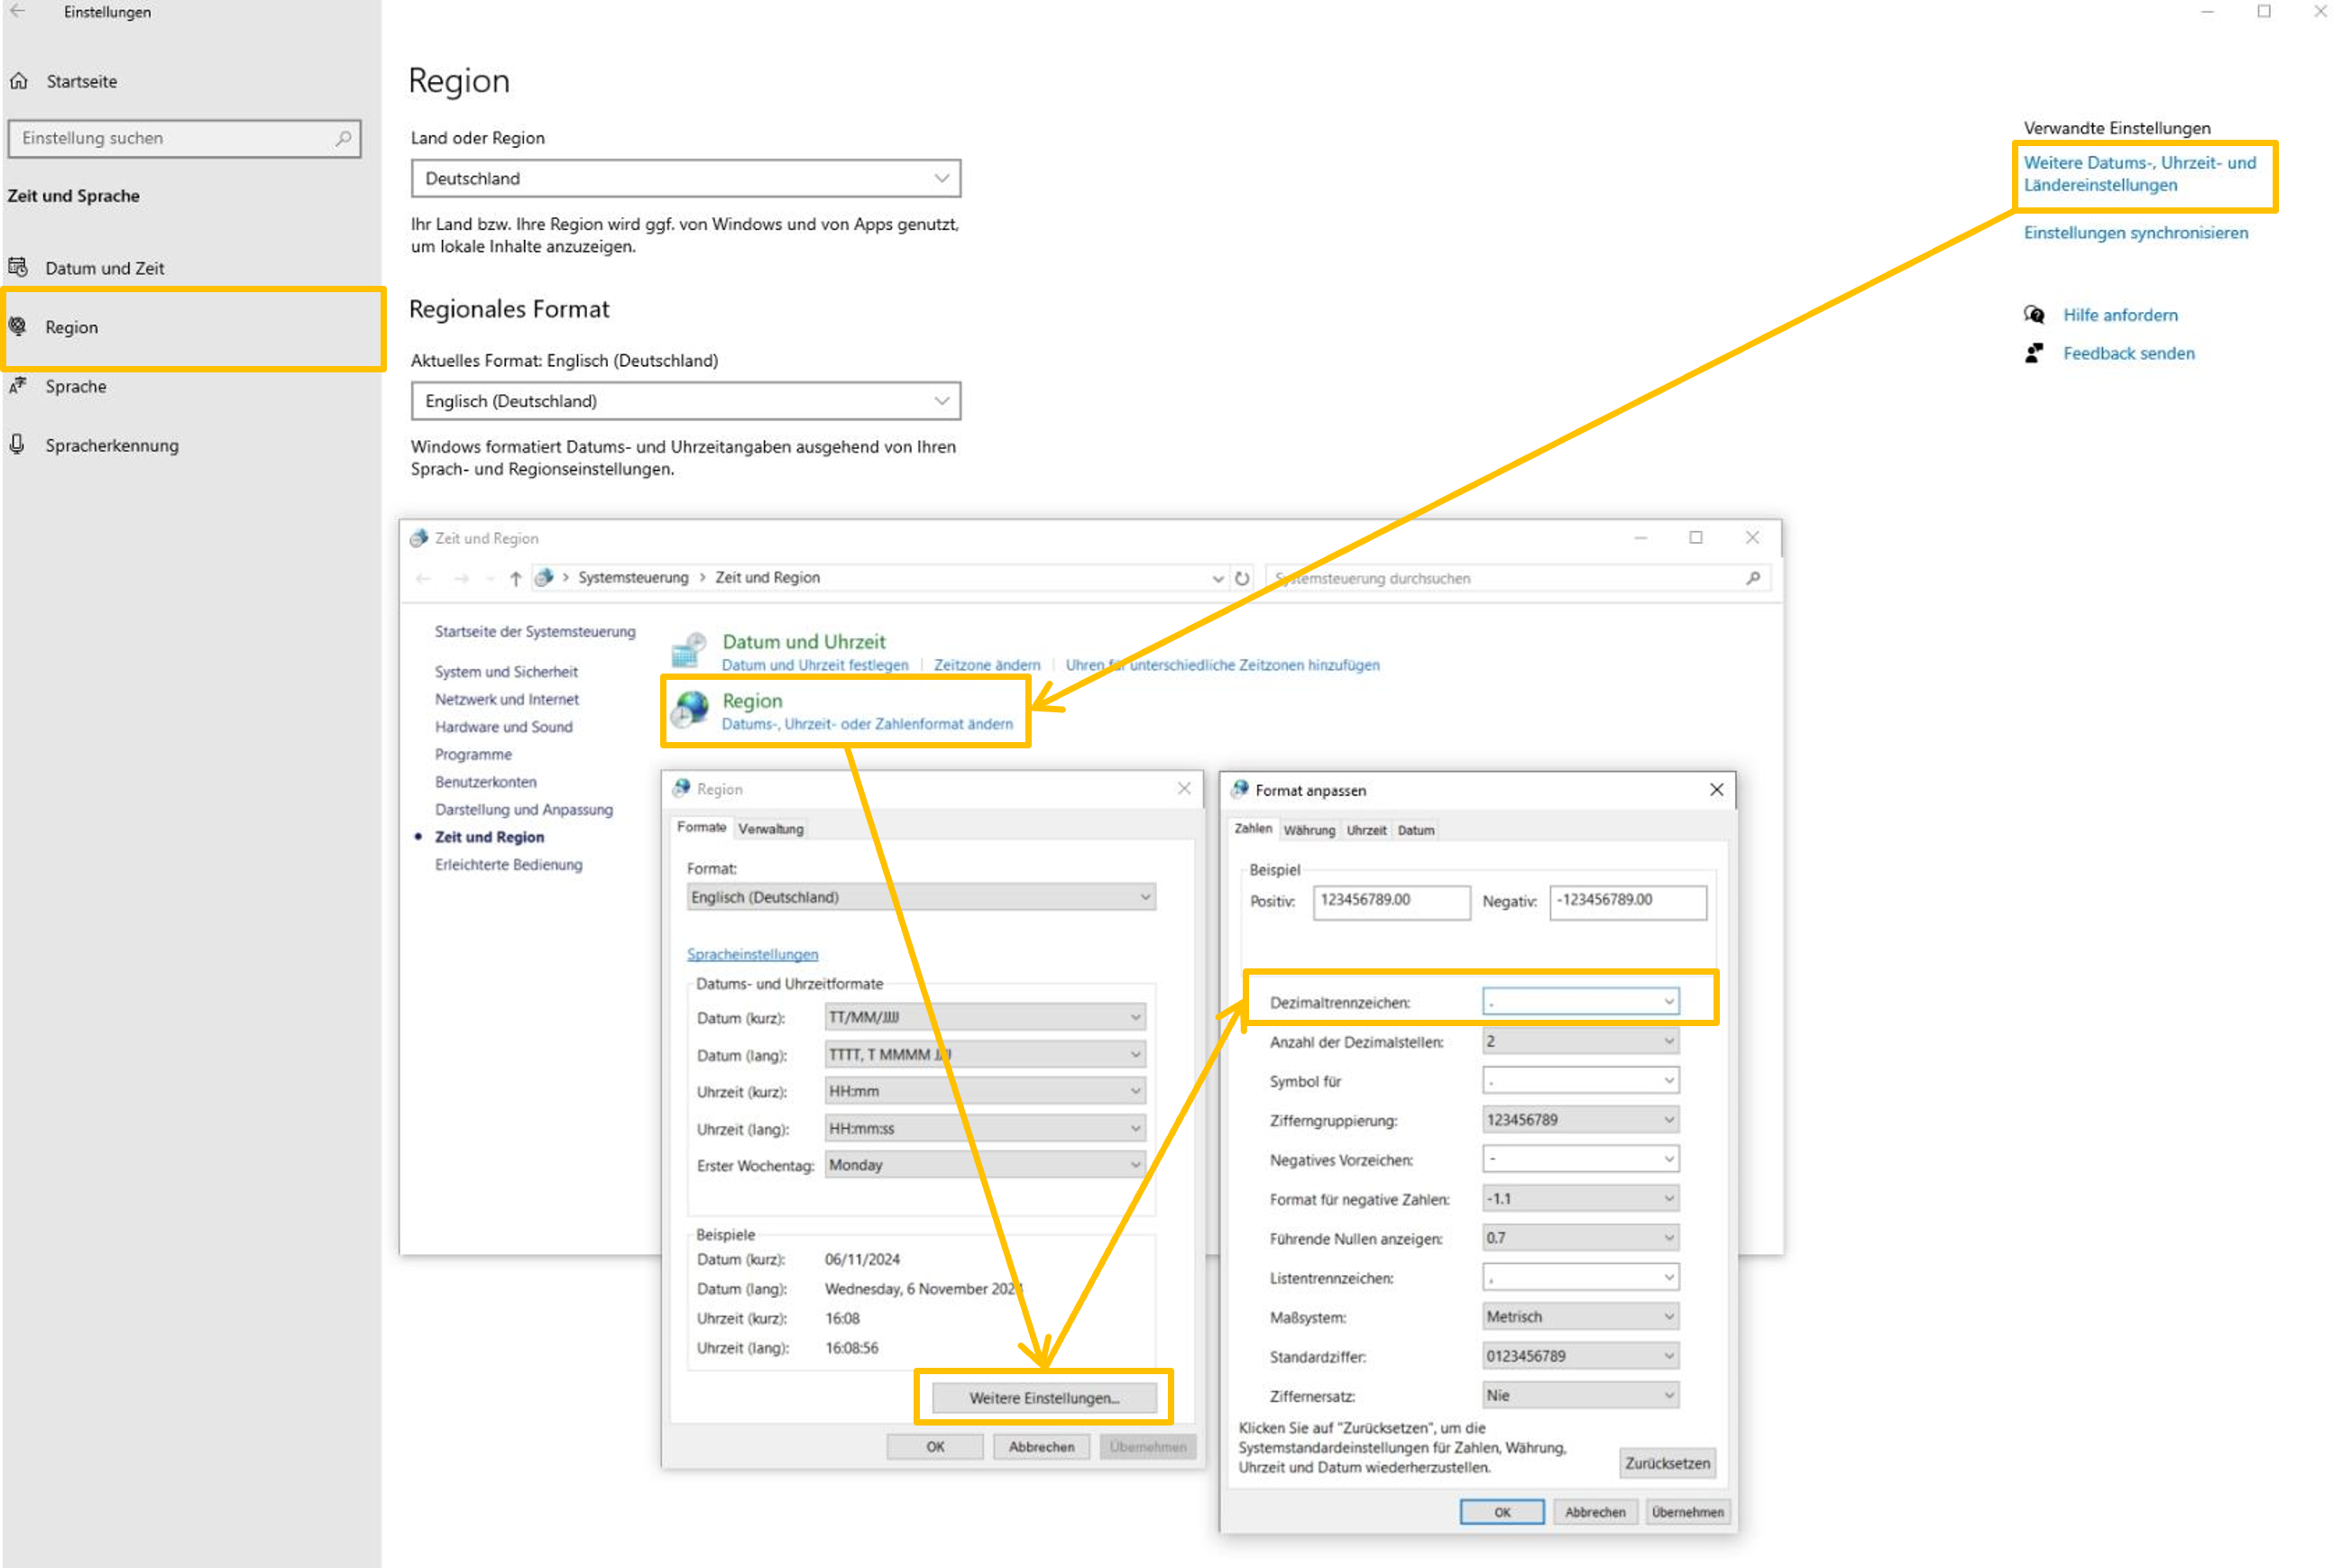
It is very important to ensure that dots are set as decimal separators in the operating system’s regional settings (e.g. 25.3)! FloodArea HPC 11 uses dots as separators.
To use FloodArea in ArcMap, ArcGIS for Desktop Background Geoprocessing (64-Bit) must be installed. The processing of the 64-bit version differs from the normal 32-bit version in that it takes place in the background. When starting FloodArea with the toolbox, the dialog can be opened via the Geoprocessing - Results menu in ArcMap, like with conventional ArcGIS tools. If you are using ArcGIS Pro, this is not necessary.
Installation
The installation of FloodArea HPC 11 is done using the supplied installation program. Appropriate administrator rights are required.
Licence
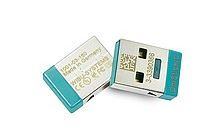
To use the full functionality of FloodArea HPC 11, you must plug the supplied dongle into a free USB port and provide a valid license file.
As long as no valid license key file is used or the dongle is not plugged into the USB port, operation of FloodArea HPC 11 is not possible. There is no demo mode.
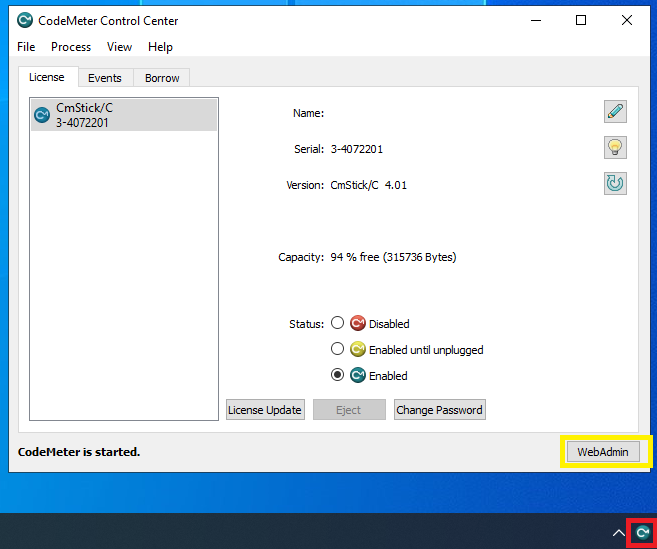
Whether the dongle has been recognized can be checked via the CodeMeter Control Center, which can be opened via the corresponding icon in the system tray (see picture below). If the CodeMeter icon is not displayed, please check via the search for CodeMeter in the Windows Start menu whether the Control Center is available, so that it can be accessed this way.
If no CodeMeter software is present, dongle installation can be completed successfully.
Note
A problem often occurs during license activation if no unrestricted administrator rights are available for the respective computer during installation. Please consider this when installing FloodArea HPC 11 and activating the dongle for license activation.
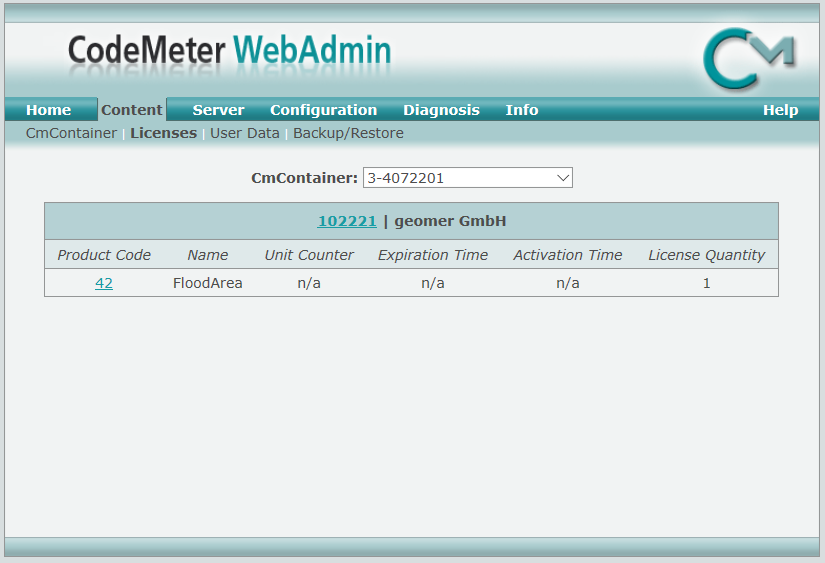
Via the CodeMeter Control Center (see above) you can open the WebAdministrator. Here you can get information about the dongle status and license entries (see below).
Demo files
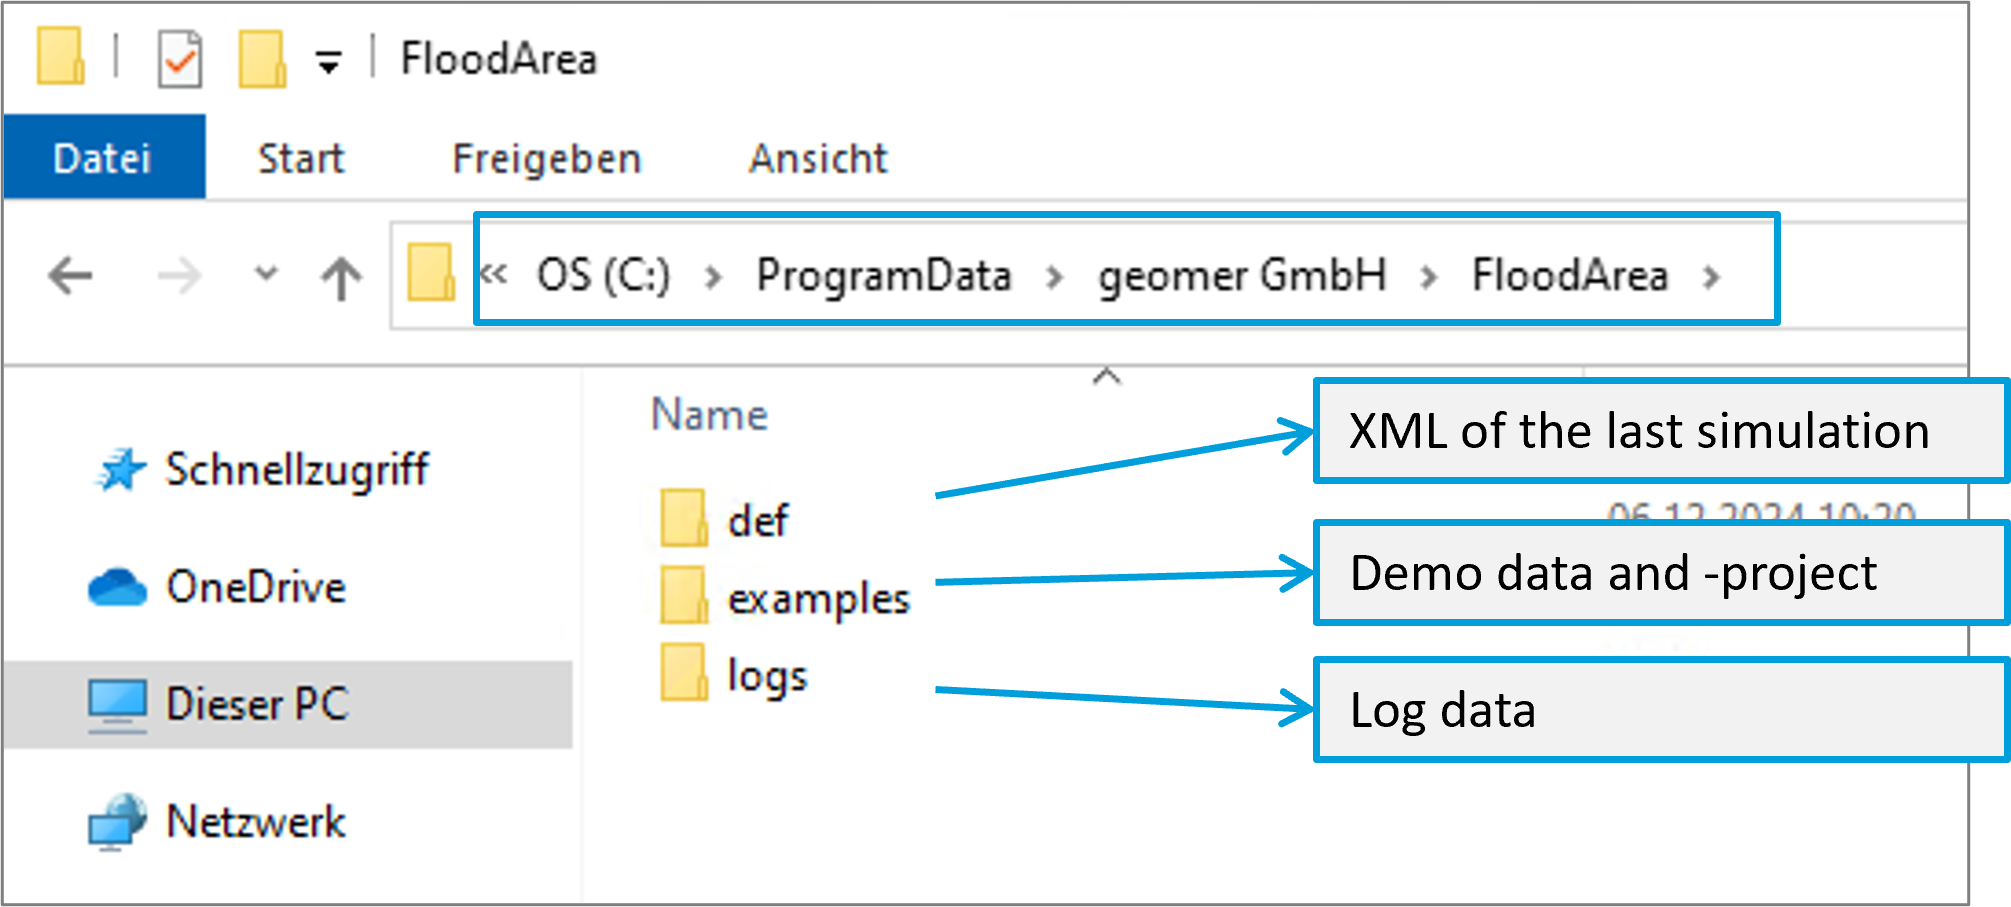
During the installation of FloodArea HPC 11, an ArcMap project file with associated demo data is installed in the user directory or copied there at first program start. The folder geomerGmbH is created in the directory that the system variable %APPDATA% points to. The path of the user directory depends on the operating system. Usually the test data is stored under this path: C:\ProgramData\geomer GmbH\FloodArea\examples Alternatively, you can enter %ALLUSERSPROFILE% in Windows Explorer and then navigate to …\geomer GmbH\FloodArea\example:
The demo files include files for all calculation options of FloodArea HPC 11. The rasters are GeoTIFF (unit: meters) with a pixel size of 5 m. The model has a size of 2047 rows to 2775 columns, corresponding to an area of approximately 28 km².
Further explanations about the simulation can be found in the chapter Start Floodarea.
The procedures and notes about tools in the next chapters refer to esri ArcGIS Pro. Tools from the extensions ArcGIS Spatial Analyst and 3D Analyst Tools are also used. The processing of input data can of course also be done with other geographic information system software products.
Input Data Format
Users can choose between three (main) calculation variants, which differ in how water is fed into the simulation model:
Water level (raster-based)
Point input (point-based)
Rainfall (raster-based)
These three functions can be combined with each other. Their use is described in detail in the respective chapter. The optional roughness functions can also be used.
The calculation of flood areas with FloodArea HPC 11 requires the following data:
A digital terrain model
A drainage network in raster format and/or
Points with input hydrographs as text files and/or
Runoff coefficient rasters with precipitation hydrographs
The digital terrain model is mandatory, while the other input data is optional. One of the three calculation options - water level, point input, or rainfall - must be active. The three calculation options can be combined as desired and coupled with the pipe network model cePipe.
The calculation options Water Level, Point Input, Rainfall and coupling with the pipe network model cePipe can be freely combined with each other.
Note
FloodArea HPC 11 simulates within the extent of the digital terrain model. Outflows into NoData areas are removed from the system but are included in the volume balance. It is recommended to place a NoData area at least two raster cells wide around the digital terrain model. This ensures that there is no backwater even at the outer boundaries.
The file format of all input rasters must be GeoTIFF with the file extension .tif. The respective text files can be created externally with any editor and must be in text format with the file extension “.txt”.
For the height unit of the DTM, meters, centimeters, millimeters, yards, feet and inches are possible. The flood depth rasters (the results) are written out in the same unit that was specified for the DTM. When simulating with water level rasters, these are also read in the same unit.
Please ensure in advance that all input raster layers are in the same coordinate system (same EPSG code). This should ensure that no different map units are present. Calculation with data that is not in any geographic coordinate system is not possible. Additionally, the data must not have a vertical height system.
Furthermore, a uniform spatial resolution (i.e., same cell size and same extent) of all raster layers is assumed. The geographic extent of a model simulation refers to the section selected in the terrain model dialog box.
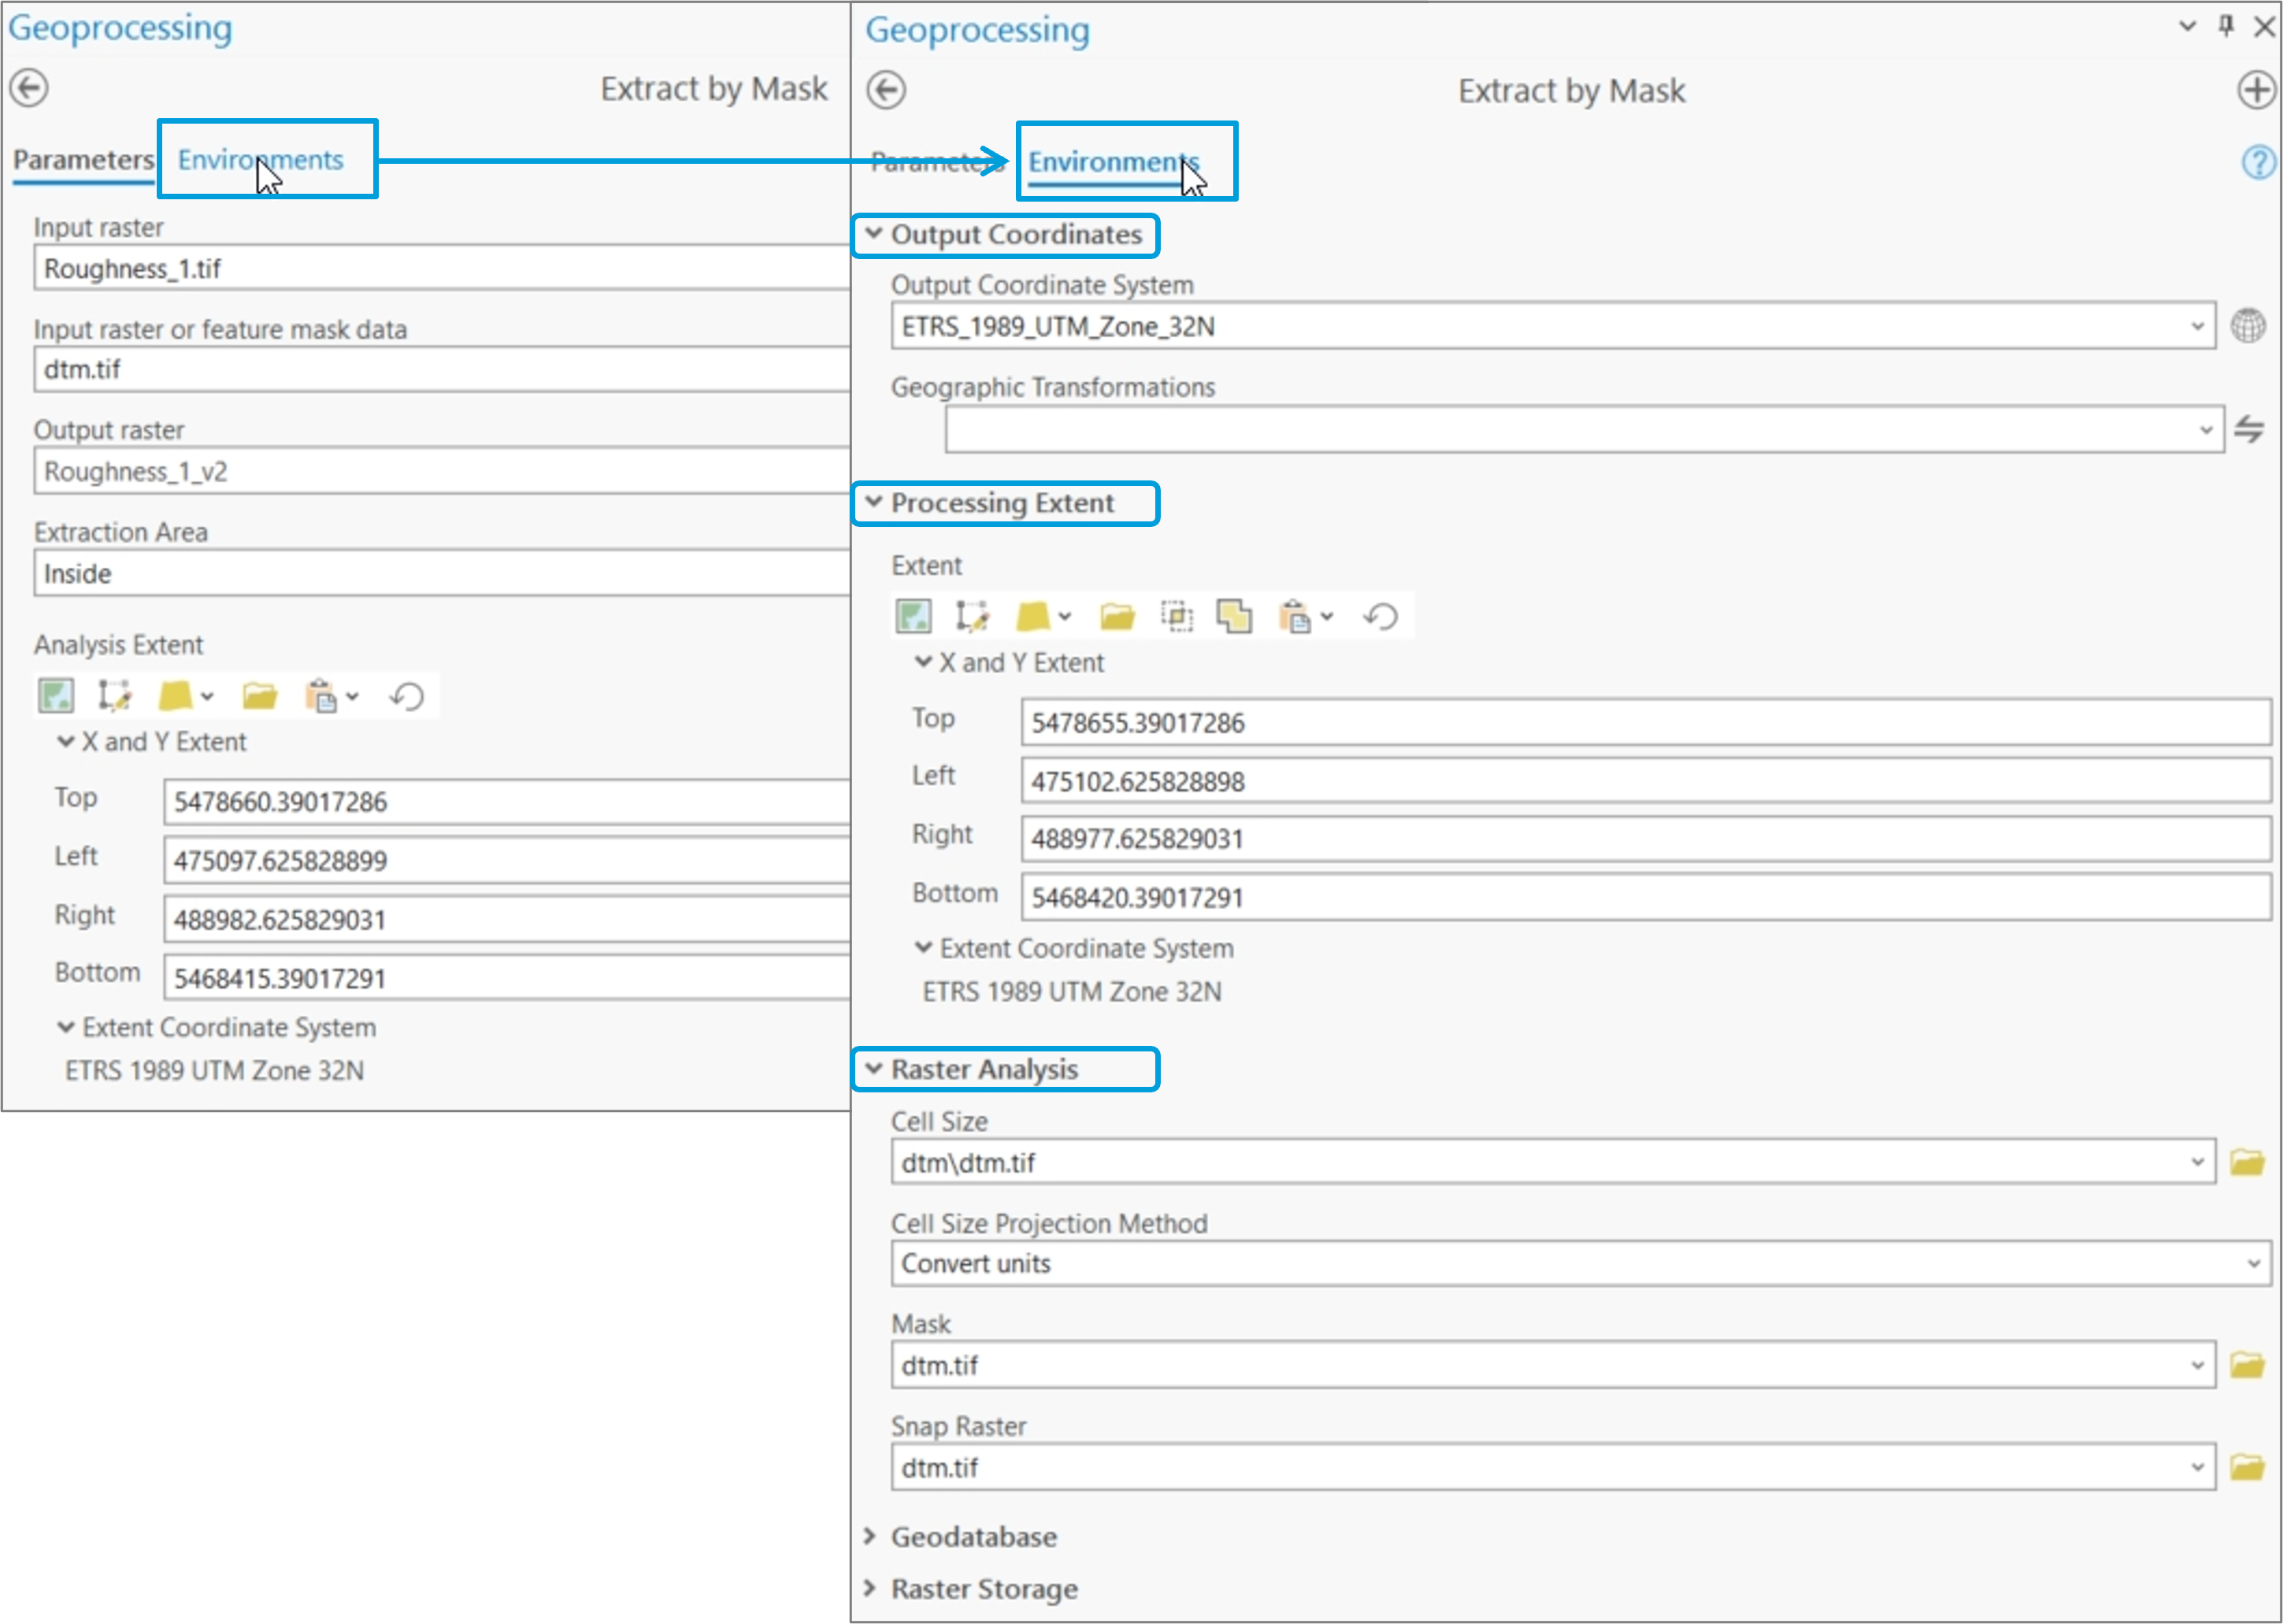
The environment settings should be maintained for each tool during data preparation. The coordinate system, processing extent and spatial resolution can be ensured as follows:
Default settings for these values can also be made for an ArcPro project under Analysis > Environment settings.
Metadata Management
FloodArea utilizes ArcCatalog’s metadata management system for managing file information. The XML definitions of the ISO standard have been extended with several elements specific to FloodArea. Additional metadata created with the standard tools in ArcCatalog can be added without losing the metadata created by FloodArea. The metadata can be easily viewed using the GUI (see Creation Information). This translation maintains the technical accuracy while making the content clear and accessible in English. The metadata can be viewed through the tool Show Meta Info.
