Command Line & Console
When calling FloodArea HPC 11 from the ArcGIS command line or the Windows console, the usual rules for using script tools apply. In this way, several FloodArea simulations can be started one after the other by a batch script.
To start FloodArea via a console, a fng.xml is required. This xml-file is written into the temp folder when starting FloodArea by the Toolbox or GUI.
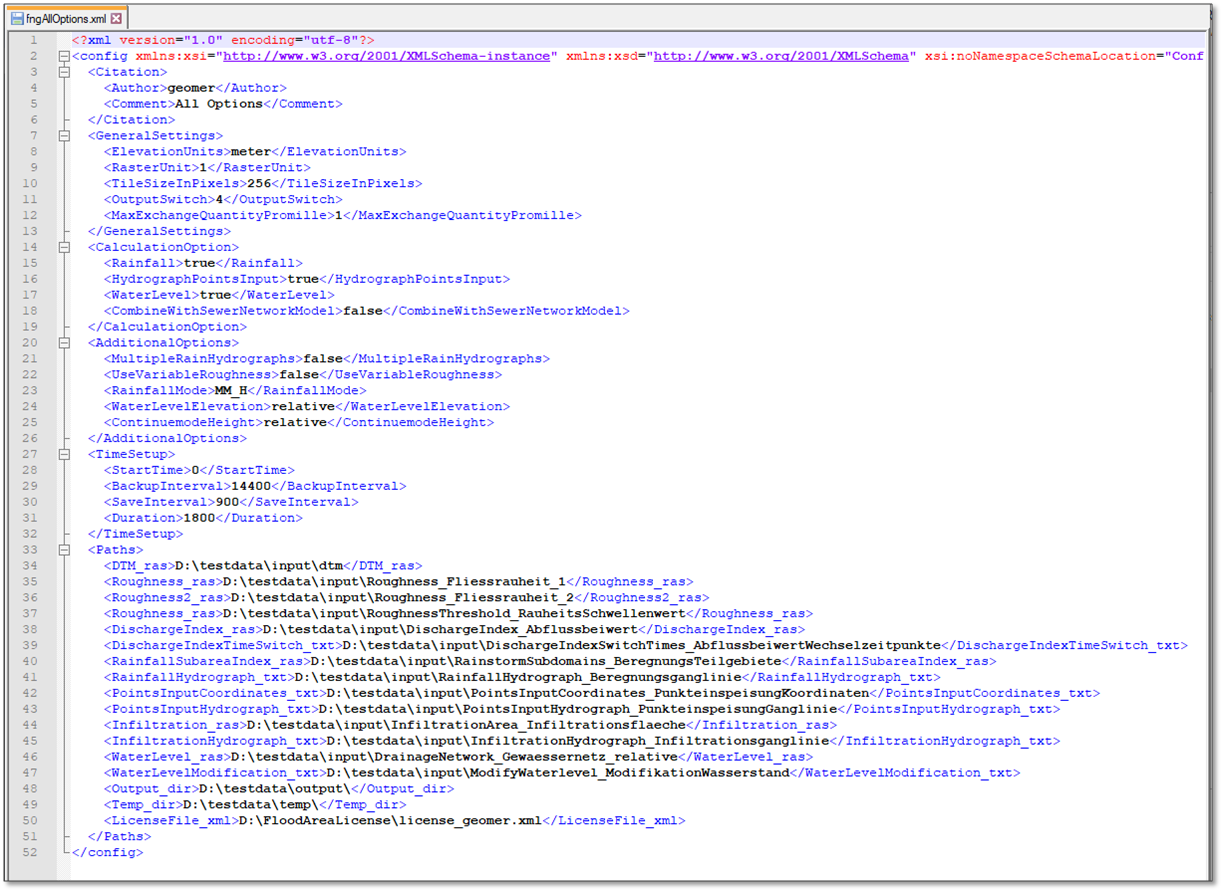
The xml-file can be copied to any location and modified using the possible parameters. The names of the parameters and their order must be the same as the structure defined in the file Config.xsd, which is also written to the temp folder during a simulation.
To start a simulation from the command line, the *Config.xsd* must be at the same place as the *fng.xml*. If FloodArea HPC 11 is started manually in this way, it must also be noted that the License.xsd file is located in the same folder of the specified license.
Here is an example for such a fng.xml:
The meaning of the General Settings, Additional Options and Time Setup can be read in the chapter Input data.
The simulation is started by navigating in the Windows command line (cmd) to the FloodArea.exe and then to the fng.xml. There must be a space between the two paths. Then press enter.
The FloodArea.exe is located in the directory in which FloodArea was installed, in the folder x64. According to the default settings during installation, the application is located in this directory: C:\Program Files (x86)\geomer GmbH\FloodArea\x64 . The entire x64 folder can also be copied to any location. This folder also contains the Config.xsd (which must be placed with fng.xml) and the License.xsd (which must be placed with the license).

